Prata: Simple Dialog System
Changelog
-
v1.2.0
-
Improvements
- Add Undo support
- Improved saving/loading graph strategy
- Now when releasing a connection on an empty space will prompt the creation of a new Node
-
New Random Choice Node
- Create Multiple sentences from a single Output
-
Improve overall Interaction model
- Add SimpleInteraction class;
- Add SequenceInteraction class;
- Add RandomInteraction class;
- Add IInteractionHolder interface;
- Remove InteractionHolder class;
-
Update Demo Scene to show this new types of interactions;
- Add NPC's to scene;
- Add NPC 3 and 4 graphs;
- Update TestDialogRenderer to preserve aspect ratio on images and hide the gameObject;
- Update Dialog Canvas on scene to show all the text on a conversation;
-
Misc
- Made MiniMap draggable
- Add icons to some scripts to make them easier to distinguish on the Editor
- Move scripts to different folders to reflect what they do
-
Introduction
First of all, I would like to personally thank you for trying out this asset!
What is Prata?
Prata is an easy to use dialog system. It makes creating a conversation a breeze with it’s in-built dialog graph tool.
Start using Prata
Setup
First of all, make sure you have a Dialog Manager in your Scene. You can either drag and drop the Dialog Canvas.prefab provided in the Samples/Prefabs folder
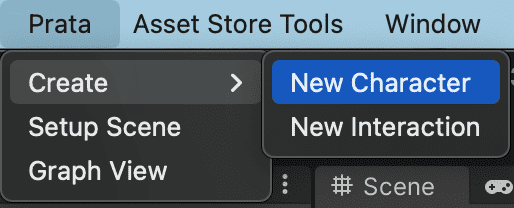
or create it from the menu on top of your Unity toolbar: go to Prata/Setup Scene to create a completely new one.
After that, you need to create the Characters that will play a role in your conversation. For this just go to Prata/Create/New Character. This will create a Resource/Characters folder if it wasn’t there already.
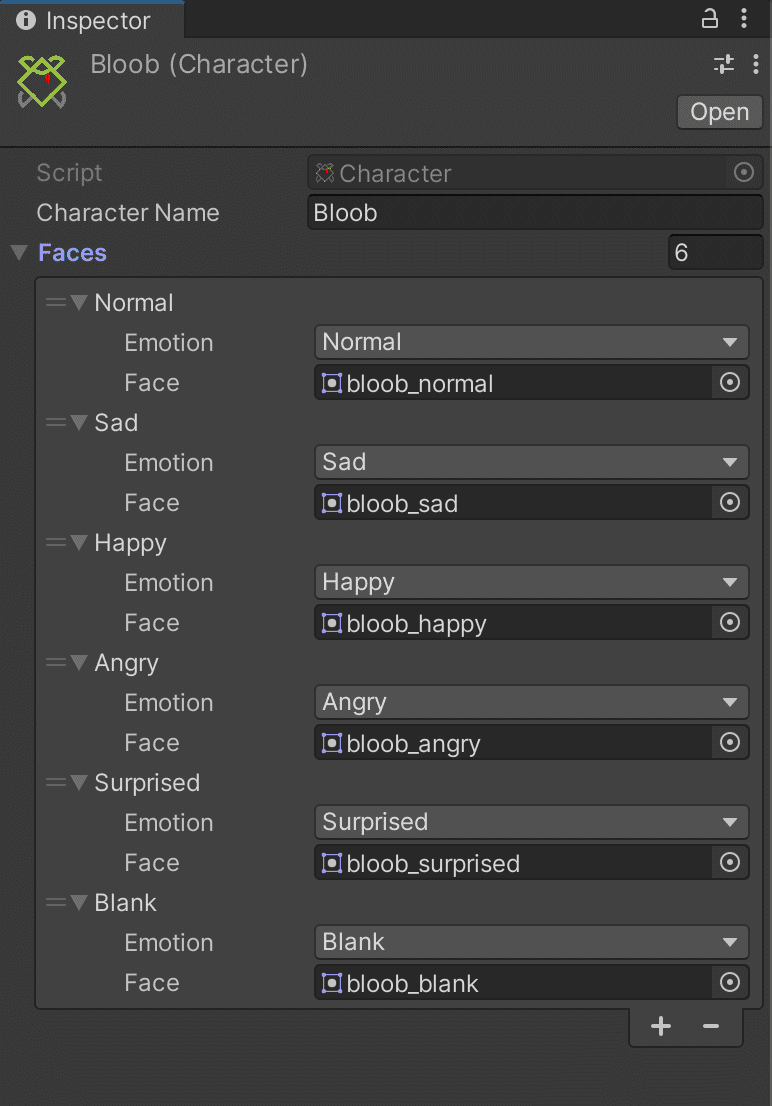
With your new character asset selected you can change the name and add the different sprites for the different emotions you want to reflect on the conversation.
The emotions can be modified under the Runtime/Scripts/Data/Models/ActorsEmotions.cs script. Try adding as much as you want! This asset helps identifies what emotion maps to a certain sprite you want to show.
Your very first Conversation
Exciting times! Now you’re ready to start using the dialog graph tool! In your Unity toolbar, go to Prata/Graph View (or just press Shift + P). This will open a new window.
Getting to now your Tool
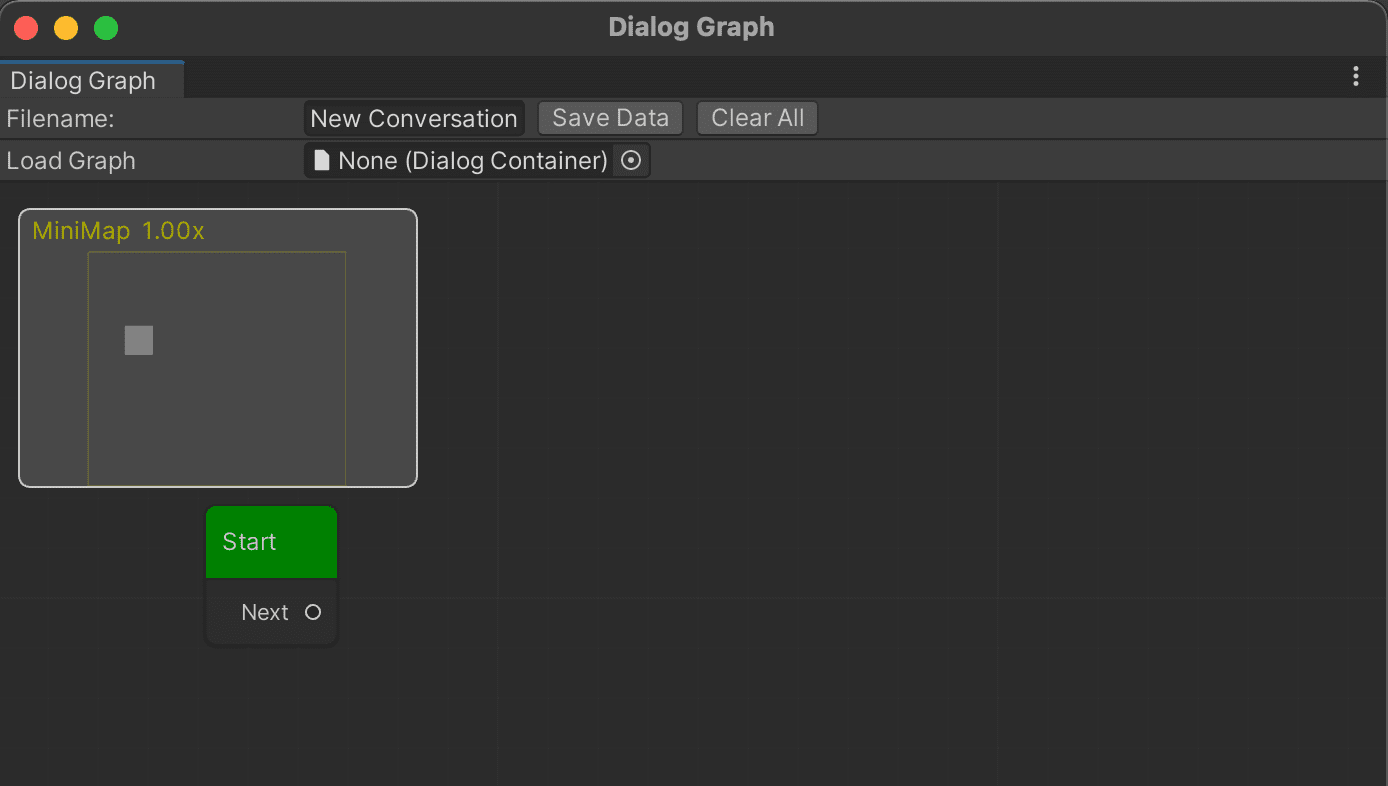
On the upper part of it you have one Input Field and 3 Buttons:
Filename: This is how do you want to save your file as. It can be something like “ Gold Discovery NPC” or something more standard as “ NPC_Tutorial_1”: it’s up to you to decide!
Save Data: Saves the graph under Resources/Graphs folder.
Clear All: it will prompt a warning and tries to clean everything on the graph. If this fails you can always select everything using your mouse and delete it manually 🙃
Load Graph: Opens a window with all the Prata conversations you have. Pick one to open it up and modify it as you want.
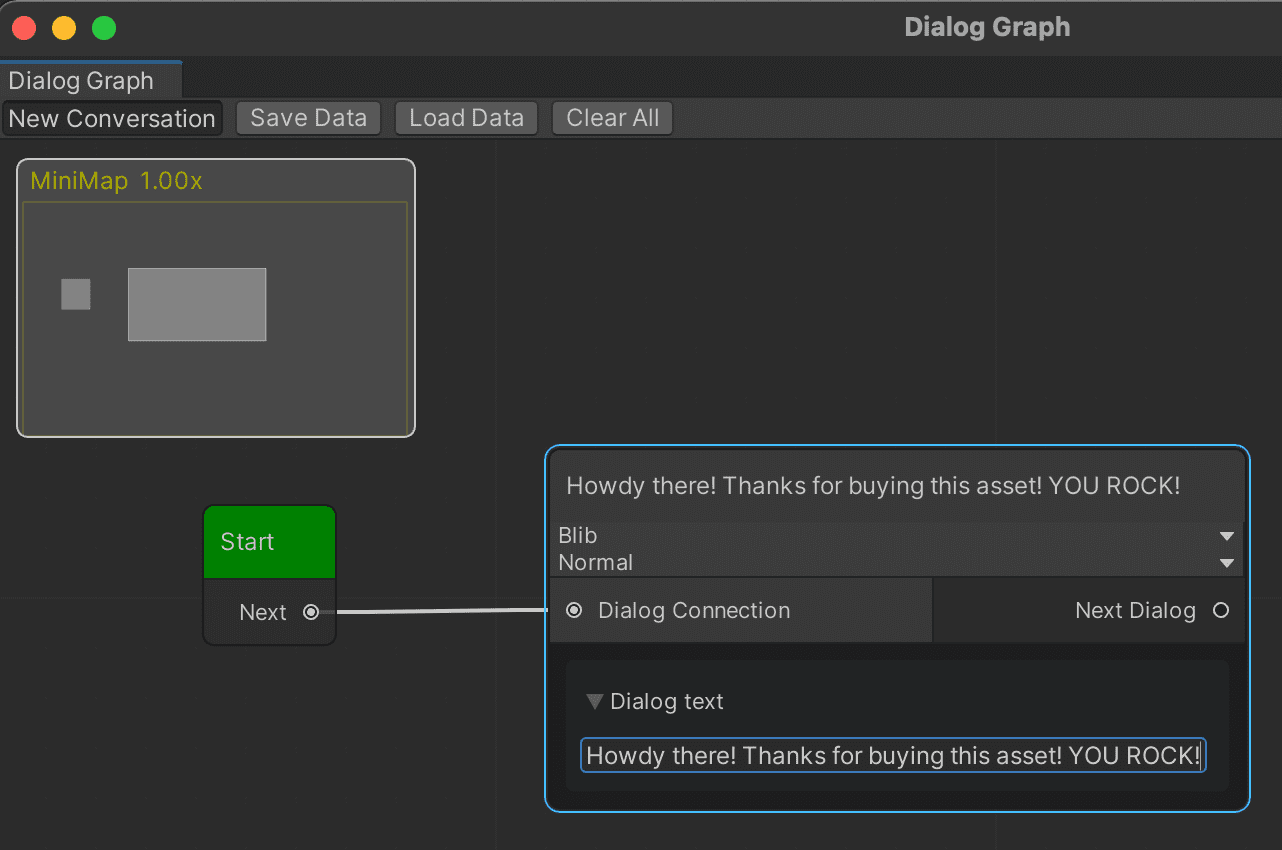
Afterwards, you have the main container part, featuring a MiniMap (so you can see where you are) that you can drag and move around and a brand new Start node! The later cannot be deleted since every conversation has to start somewhere right?
This container behaves similar to the one when you use Shader Graph (if you haven’t used it is fine, but please do you a favour and start playing with it! It’s super fun and useful!). You can add a dialog node in 3 different ways:
- Right clicking → Create Node → Dialog Node → [SELECT A NODE]
- Right clicking → Add [SELECT A NODE]
- Press space → Create Node → Dialog Node → [SELECT A NODE]
Your first Node
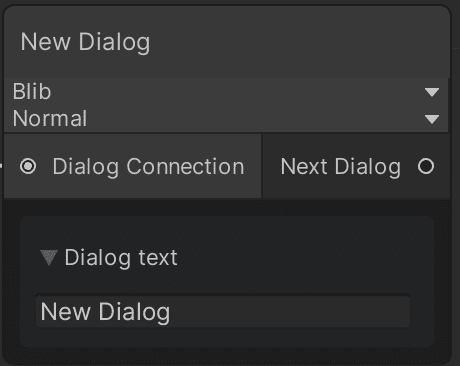
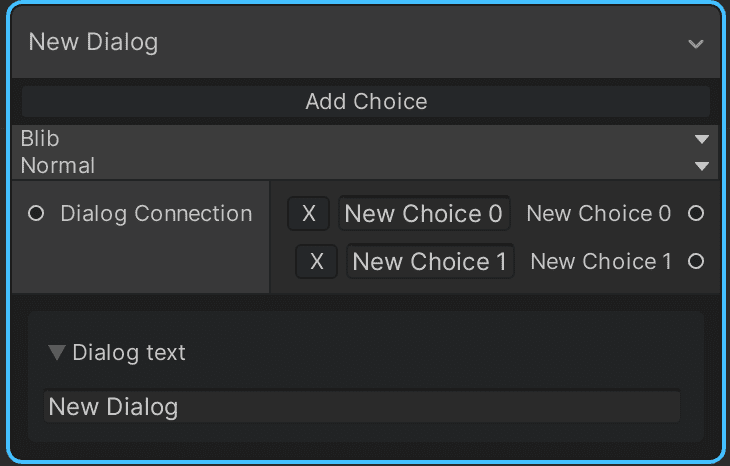
After following the steps above you should have something like this:
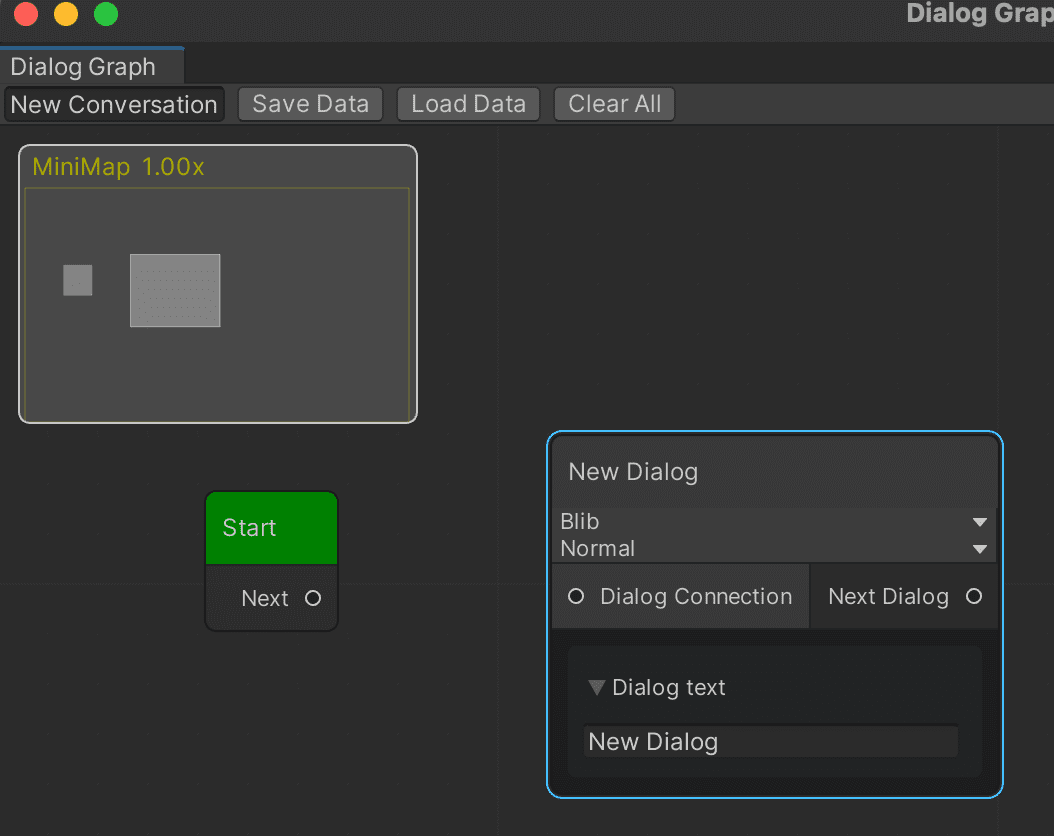
It may look different since under the title “ New Dialog” you will see every Character previously created and every possible emotion. You can use this drop down menus to change who is speaking and in what tone you want to portrait them.
On the bottom part of that node, you can change what this specific character will say using the input text field. After you made the changes, drag the Output from the Start node to the Input of the new node (you will see a line in between the nodes) to determine the flow of the conversation.
You can create as many nodes as you want. When you are happy with your dialog, just press the Save Data button on the top of this window. This will generate a new graph asset. It’s super powerful and it’s the brain of everything. On a nutshell, it contains the data of each node and how they are related. You don’t need to modify it or anything since this operations must be done on the Graph View (perhaps just look at it so it doesn’t feel so lonely).
Nodes
Single Choice Node
Character dropdown: Select one of the previously created Characters to represent who is saying this.
Emotion dropdown: Select one of the emotions you want to portrait. Be aware that this will map into the Character’s object so be sure that the selected emotion has a sprite set.
Dialog Text: Here you can write whatever you want that character to say.
Next Dialog: Output for this node. Drag this to another node if you want to continue the conversation.
Multiple Choice Node
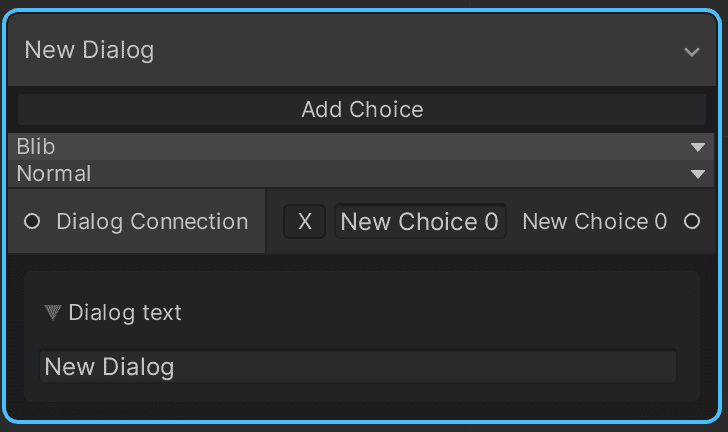
Super similar to the Single Choice Node but with extra functionality. What is new is:
Add Choice button: this will create a new choice output that you can drag to another node to continue the conversation.
X button: located to the left of each choice. This will remove the choice.
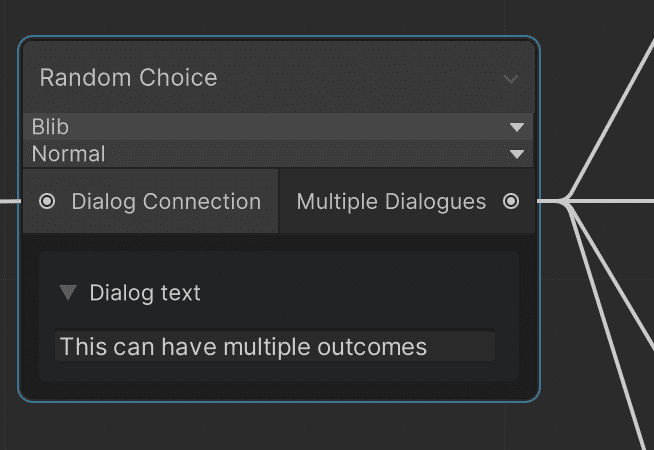
Random Choice Node
As the other 2 nodes, this one allows a text as an input BUT can have multiple other Nodes as an output. It will choose randomly between the possible outcomes.
Character dropdown: Select one of the previously created Characters to represent who is saying this.
Emotion dropdown: Select one of the emotions you want to portrait. Be aware that this will map into the Character’s object so be sure that the selected emotion has a sprite set.
Dialog Text: Here you can write whatever you want that character to say.
Multiple Dialogues: Multiple Outputs for this node. Drag this to as many nodes as you want to continue the conversation. It can be mixed with other types of nodes!
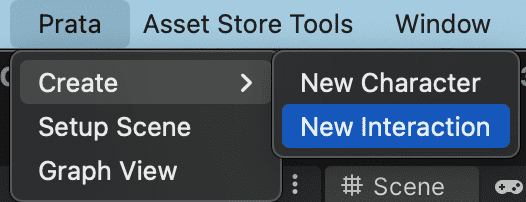
Creating an Interaction
To be able to tell the game to use a specific graph you made, we first need to create an Interaction. Just go into your Unity toolbar on the top, go to Prata/Create/New Interaction
And drag the graph asset to it on the inspector under the Dialog Container field.
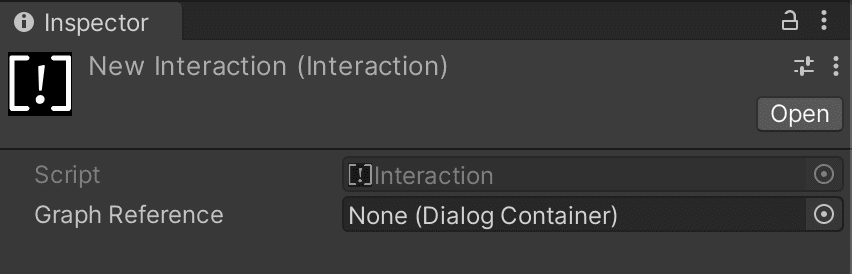
Graph Reference: it’s the actual graph/conversation that you have created previously.
Displaying a Conversation
Ok, now that you have spent time doing your conversation you would like to see something right? Worry not my fellow game dev! You are steps away for that to happen. For this, you need:
- an object (for example an NPC) that holds an I InteractionHolder implementation script and
- another object (for example Player) that can detect it and interact with it using a DialogInteractor script.
Step 1: IInteractionHolder
On your Demo Scene look at all the NPCs prefabs. All of them contain some concrete implementation of the IInteractionHolder interface and some sort of triggering collider as follows:
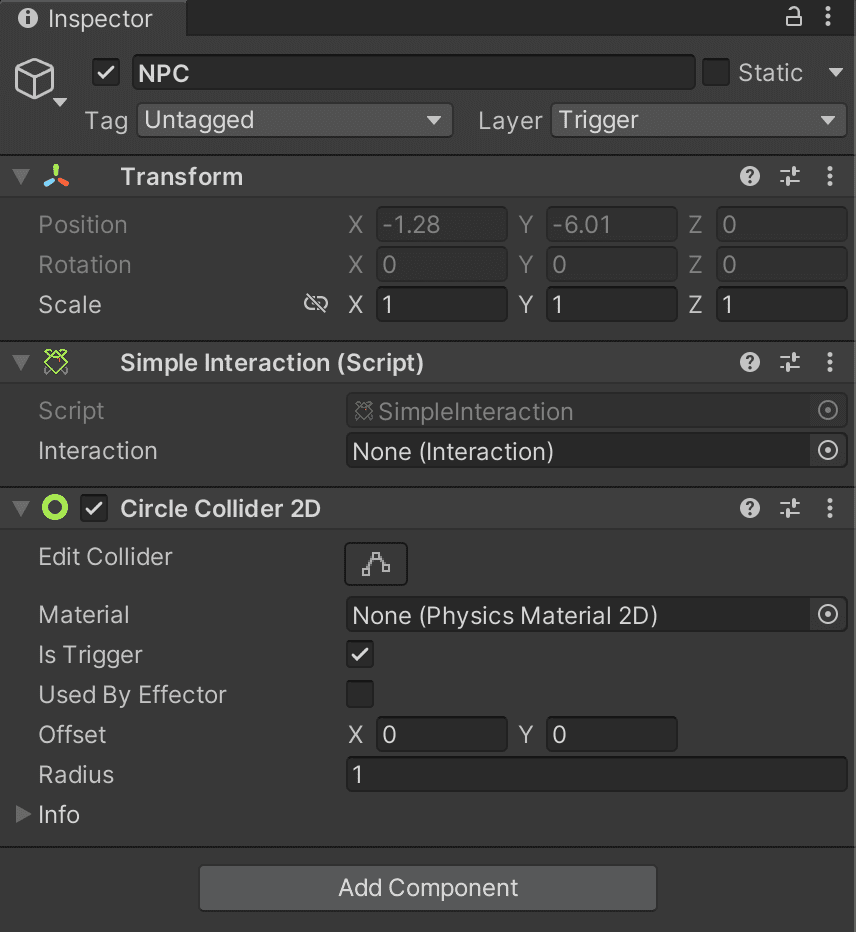
Note: any type of collider is good but it must be set as trigger by enabling the “ Is Trigger ” field.
Also, something worth mentioning is that the NPC uses a different type of Layer: Trigger which will be useful later for its detection.
On its core, what it does is knowing what Interaction you want to trigger.
For convenience, there are 3 types of IInteractionHolders implementations. Of course you are free of making your own or come up with suggestions!
IInteractionHolders
Simple Interaction
As the name suggests, it’s just a simple interaction. It will happen only once during runtime.
Random Interaction
This one holds multiple Interactions but it will choose randomly which one to display each time. Useful for wondering NPC’s.
Sequence Interaction
This one also holds multiple Interactions but it will display them in sequence, one after the other.
Step 2: Dialog Interactor
Inside the Player prefab you can see a GameObject called Dialog Detector. It holds a DialogInteractor component. This component is in charge of detecting any possible interaction in your world. It has useful callbacks (in the form of UnityEvents) for convenience.
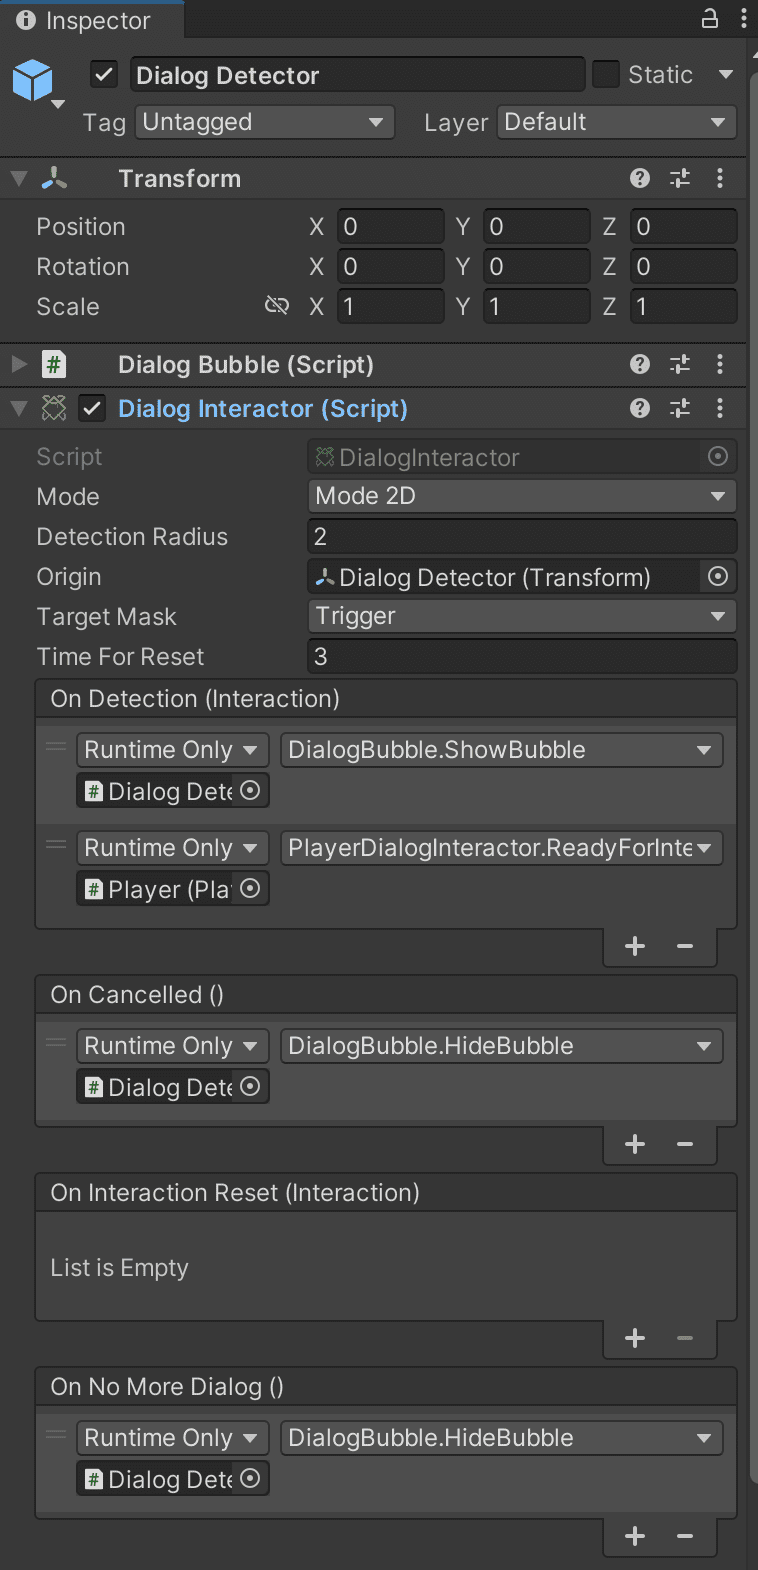
Mode: detection mode to use. It can be either 2D or 3D.
Detection Radius: how far in units should we search for.
Origin: the transform on where to start the circle to listen for interactions.
Target Mask: it’s the Layer Mask to use for triggering the interaction.
Time for Reset: if you start a conversation and cancel/leave it, this is an internal timer in seconds for how long should it wait to restart the conversation (start from the beginning).
Step 2.1: Callbacks
OnDetection (Interaction interaction): called whenever a new Interaction/conversation is detected
OnCancelled(): called whenever the player cancels an conversation
OnInteractionReset(Interaction interaction): called whenever an interaction resets
OnNoMoreDialog(): called when there’s no more dialogues on a conversation (ie the conversation has ended).
On the demo scene you can see how we use this callbacks to show/hide the bubble sprite for example.
Step 3: Player Dialog Interactor
Of course you can choose however you want to interact in a conversation. For convenience on the Samples folder we’ve created this script. Basically it receives the calbacks from the DialogInteractor, caches the Interaction to use and whenever there’s an available Interaction, we can display it when pressing the G key on the keyboard (or anything you can setup).
This script is used on the Player.prefab and it’s in charge of interacting with the DialogManager.
So to simply start or resume a conversation just call Talk and pass the proper interaction:
DialogManager.Instance.Talk(interaction);
Dialog Manager
Before we talked a little bit about the Dialog Canvas.prefab which holds the DialogManager.cs script. This script it’s a Singleton (uff... I know! If you have a better way please let me know) which means it’s only 1 instance on the scene. It’s the entry point to “Talk”, “Show Dialog”, “Hide Dialog” and “Make a Choice”. It has Action Events, meaning that any script can register to them and start listening to them:
public Action OnDialogStart = delegate { };
public Action OnDialogEnds = delegate { };
public Action OnDialogCancelled = delegate { };
So for example in your move-camera-to-focus-to-the-player script you could do:
private void Start()
{
    DialogManager.Instance.OnDialogStart += HandleDialogStart;
    DialogManager.Instance.OnDialogEnds += HandleDialogEnd;
    DialogManager.Instance.OnDialogCancelled += HandleDialogEnd;
}

private void OnDisable()
{
    DialogManager.Instance.OnDialogStart -= HandleDialogStart;
    DialogManager.Instance.OnDialogEnds -= HandleDialogEnd;
    DialogManager.Instance.OnDialogCancelled -= HandleDialogEnd;
}

private void HandleDialogStart()
{
    // focus on the player
}

private void HandleDialogEnd()
{
    // stop focusin on player and focus on the scene
}
Note: An example script using Cinemachine is below under the “Extras” section.
Alternatively we created an abstract DialogRenderer.cs script to render a dialog. You can see a TestDialogRenderer component inside the Dialog Canvas.prefab to show each conversation on a basic way. You can create your own to fit your game!
Wrapping up!
Now you are set to start your own game!
The possibilities of expansion are endless!
Thanks again for trying Prata! If you are curious about what else we have, check more of our content in our Shop on the Asset Store!
For any further question not covered here feel free to contact us at support@berserkpixel.studio
Extras
We didn’t want to bloat this library with more dependencies but we played around with Cinemachine to focus the player when starting a dialog and focusing on the scene when it’s not. The code is below:
using Cinemachine;
using UnityEngine;

namespace BerserkPixel.Prata.Camera
{
    [RequireComponent(typeof(CinemachineVirtualCamera))]
    public class DialogCinemachineController : MonoBehaviour
    {
        [SerializeField] private float zoomLens = 4;
        [SerializeField] private float zoomDuration = 2f;
        [SerializeField] private float screenY = -.15f;

        private CinemachineVirtualCamera virtualCamera;
        private CinemachineFramingTransposer framingTransposer;

        private float startLens;
        private float targetLens;

        private float startScreenY;
        private float targetScreenY;

        private void Awake()
        {
            virtualCamera = GetComponent<CinemachineVirtualCamera>();
            startLens = virtualCamera.m_Lens.OrthographicSize;
            targetLens = startLens;

            framingTransposer = virtualCamera.GetCinemachineComponent<CinemachineFramingTransposer>();
            startScreenY = framingTransposer.m_ScreenY;
            targetScreenY = startScreenY;
        }

        private void OnEnable()
        {
            DialogManager.Instance.OnDialogStart += HandleDialogStart;
            DialogManager.Instance.OnDialogEnds += HandleDialogEnd;
            DialogManager.Instance.OnDialogCancelled += HandleDialogEnd;
        }

        private void OnDisable()
        {
            DialogManager.Instance.OnDialogStart -= HandleDialogStart;
            DialogManager.Instance.OnDialogEnds -= HandleDialogEnd;
            DialogManager.Instance.OnDialogCancelled -= HandleDialogEnd;
        }

        private void Update()
        {
            virtualCamera.m_Lens.OrthographicSize = Mathf.Lerp(
                virtualCamera.m_Lens.OrthographicSize,
                targetLens,
                zoomDuration * Time.deltaTime);

            framingTransposer.m_ScreenY = Mathf.Lerp(
                framingTransposer.m_ScreenY,
                targetScreenY,
                zoomDuration * Time.deltaTime);
        }

        private void HandleDialogStart()
        {
            targetLens = zoomLens;
            targetScreenY = screenY;
        }

        private void HandleDialogEnd()
        {
            targetLens = startLens;
            targetScreenY = startScreenY;
        }
    }
}